Header/Navigation Bar/Social Media Icons

Thursday 30 April 2015

Liebster Award

I am so honored to be nominated for The Liebster Award by Marie at Once Upon A Classroom. I love her Tech Tuesday posts and have learned so much from her!  I am truly surprised and touched that she thought of me!  Now, a bit about the Liebster Award… 


The Liebster Award is given to beginning bloggers to help acknowledge up and coming blogs. Upon receiving the nomination, the blogger answers 11 questions to help their followers get to know them better. Then, I will have a chance to nominate 11 other bloggers!

1.            Why and how long ago did you start blogging?

I started blogging in March of this year as a way to share resources, information and tips with other educators, therapists and parents.  I am in my seventh year of teaching in the Autism Transitional Classroom and have strived to grow as a Special Education teacher in each of those seven years.  Teaching students with Autism is my passion and I spend more hours than I wish to count, reading articles and books, researching ideas and resources and shopping for and making teaching materials for my students.  Because of the unique model of our classroom (read more about it here), it serves as a demonstration classroom for other teachers and school boards.  Each year, we have several visitors ranging from EAs all the way up to Superintendents and Ministry reps from the Southwest region of our province.  We also have visitors from a variety of community agencies that come to our classroom to learn about the teaching practices we use.  This year, I was asked by my principal and superintendent to consult to two of our high schools to assist them with implementing evidence based practices in the life skills classrooms.  Every week, I get emails asking for resources, ideas, tips and strategies.  I started this blog in an attempt to share what I have learned with others  and to have a place where I could direct them to get the information they are looking for.

2.         What one word sums up the heart of your blog and why?

I know that every teacher will probably say this, but I have to say LEARNING!!!  I am continuously learning about new ways to teach and reach my students and I love to share what I have learned with others.  If I ever stop learning, then I will stop teaching.  I truly believe that in order to be a great teacher, you need to be a life long learner.  If you don't further your own professional learning, how will you further your teaching practices?  I hope that my blog will inspire others to continue in their own professional learning, thereby helping them to grow as teachers.

3.     Is there something you learned late in your blogging journey you wished you knew before?

I am so new to blogging that I feel I still have tons to learn!  I am so grateful for the other teacher bloggers who have reached out to me to offer advice, encouragement and inspiration!  I have learned so much from them since I started and am continuously learning new things each day!  The only thing I wish I would have known about were the cute blog designs available!  Is it horrible that I want a new blog design already?!

4.         What is your favorite pastime other than blogging?

I love doing yoga, playing with my dogs and spending my time with my sweet and supportive husband!  We love travelling, trying new foods and visiting wineries together.  We also love golfing and camping, however, we never seem to have enough time to do all these things!  

5.         How many hours a week do you dedicate to your blog/TPT?

It varies from week to week, depending on what else is going on in my life.  When I first started, I wrote out a weekly schedule for myself of days I would write blog posts.  And, I stuck to it for the first two weeks!  As I connected with other bloggers, I altered the schedule so I could join in link parties in an effort to build my blog audience.  As I connect with more and more bloggers, I try to join in on the linky parties I am interested in, so I am more flexible in my postings and not adhering to a schedule so much.  It really is a balancing between work, my blog, making teaching materials, reading and research, and of course saving time for me and my family!

6.         What category of blog posts do you enjoy most?

I have to admit that I love blogging about the independent work tasks that I make for my students!  I started linking up with Autism Classroom News' Workbasket Wednesday posts and am hooked!  I have to say that this is mostly due to the fact that I am a Dollar store junkie and love sharing what I make from my purchases!  I know that some of you are share my addiction!  Admit it!!!

7.          Where does your blog inspiration come from?

Most of my inspiration comes from my students and their learning needs.  But, it also stems from a desire to help others.  I try to write posts that I think will assist other educators with their professional development and teaching practice.

8.         Which post that you’ve written are you most proud of?

Hmmm.I guess I would have to say my series on Structured Learning, also known as TEACHH.  Structured Learning is such an integral part of my classroom and such a good practice to use in any classroom, but especially in an Autism classroom.  I have been trained in Structured Learning and love to share how I use it in my classroom with anyone who will listen!  I hope that these posts were informative and helpful for teachers wanting to learn more about SLE, or looking for different ideas on how to use it in their classrooms.

9.     Is there a post you have been planning to do but have been postponing it for a while now?

I have so many ideas for blog posts, that it's hard finding the time to write about them!  One that I have been working on is about teaching play to children with Autism.  I am trying to work out if it should be a series of posts, or just one post.  There are many aspects to this and I have been busy making materials to go along with it.  This is such a difficult area for children with Autism that I want to make it a great post and ensure that I have some great resources to go along with it.  At this rate, I may not get to it until the summer.

10.     What is your favorite aspect of blogging?

My favorite aspect about blogging is connecting with other teachers. I have met so many dedicated and supportive teachers during my short journey and have learned so much from them.  I truly feel like blogging only increases my knowledge and passion for teaching.

11.         Which idea from a blog would you like to try yourself?

There are so many great ideas that teacher bloggers share!  But, one I really want to try was posted by Gabrielle Dixon at Teaching Special Thinkers about a week ago.  She came up with the idea of using QR Code Choice Rings for her students as a way of allowing them to access the websites they want within a limited amount of choices.  This cuts down on the reliance of an EA typing in the website for them and also limits which ones they can choose from.  She provided a great tutorial for those of us who have never used QR codes and I can't wait to try it!

Now I nominate these wonderful teacher bloggers:


Tuesday 28 April 2015

Learn with your Craft Stash - Clothespins

Today I am linking up with Kim over at Life Over C's to highlight different ways to use regular craft supplies to enhance learning.  This is going to be a 21-day event covering many different craft materials you might have stashed at your home or classroom. I will not be blogging for each of the 21 days, but I will be linking up with her several times throughout the month. Each blog post will feature a different craft item. You don't want to miss a day, so make sure to click on the image to hop on over to all the action.


Today is all about learning with clothespins. Clothespins are not just for working on fine motor skills and building hand strength.  You can also use them for lots of different learning activities and easily target multiple learning skills.

I use clothespins for teaching a variety of skills in my classroom.  I love that they can be used with students across abilities for a wide range of learning activities.  I think I should mention that before I introduce learning activities to my students using clothespins, I make sure that they know how to open the clothespins and can clip them onto card stock, popsicle sticks, craft foam, etc.  I have seen many of my students try to attach the clothespin to the material presented using the end that doesn't open and get frustrated because it doesn't attach.  So, before using clothespins with your students, make sure they have enough fine motor coordination and hand strength to open them and know which end to squeeze.

Once, I know a student can use a clothespin to attach it to different materials, I will use them for a variety of different learning activities, beginning with matching tasks.


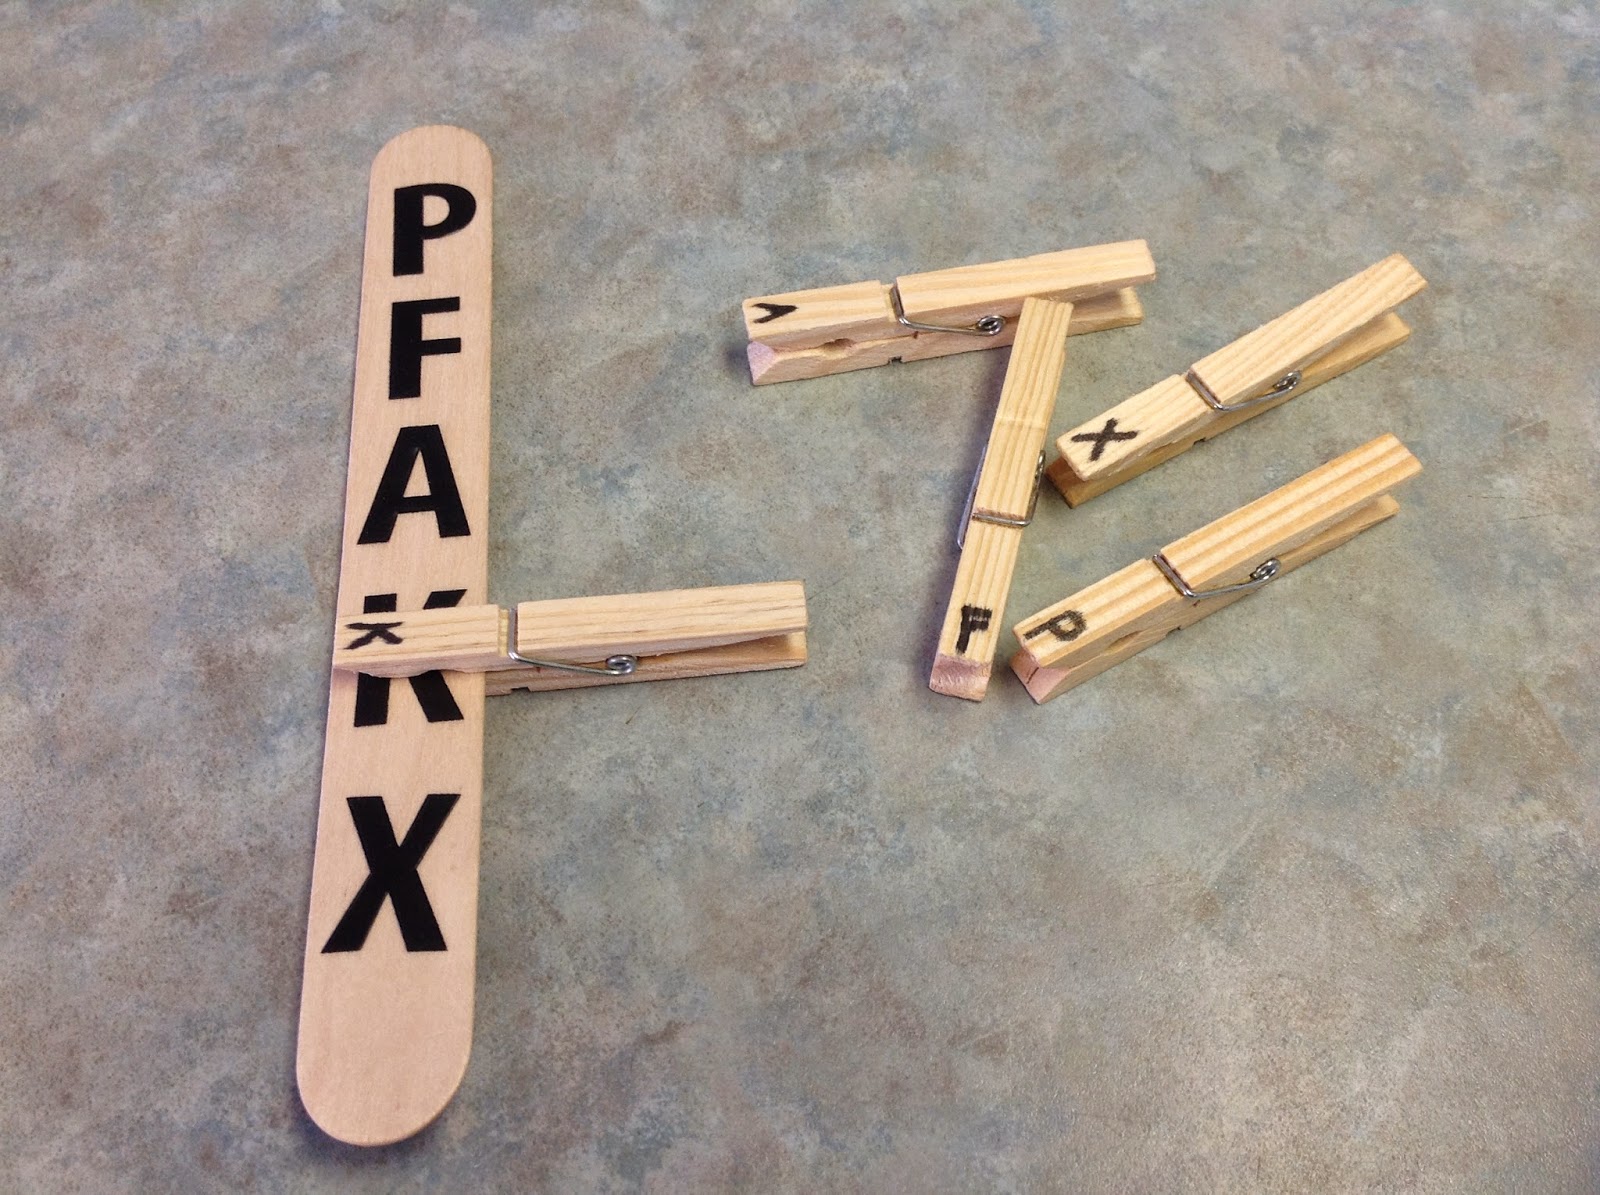
These were quick and easy to make using large craft sticks, stickers, wash tape and of course, clothespins!  I made these to target matching colours, letters and numbers, but you could  also use the same materials to make matching tasks for shapes, upper to lowercase letters and counting.

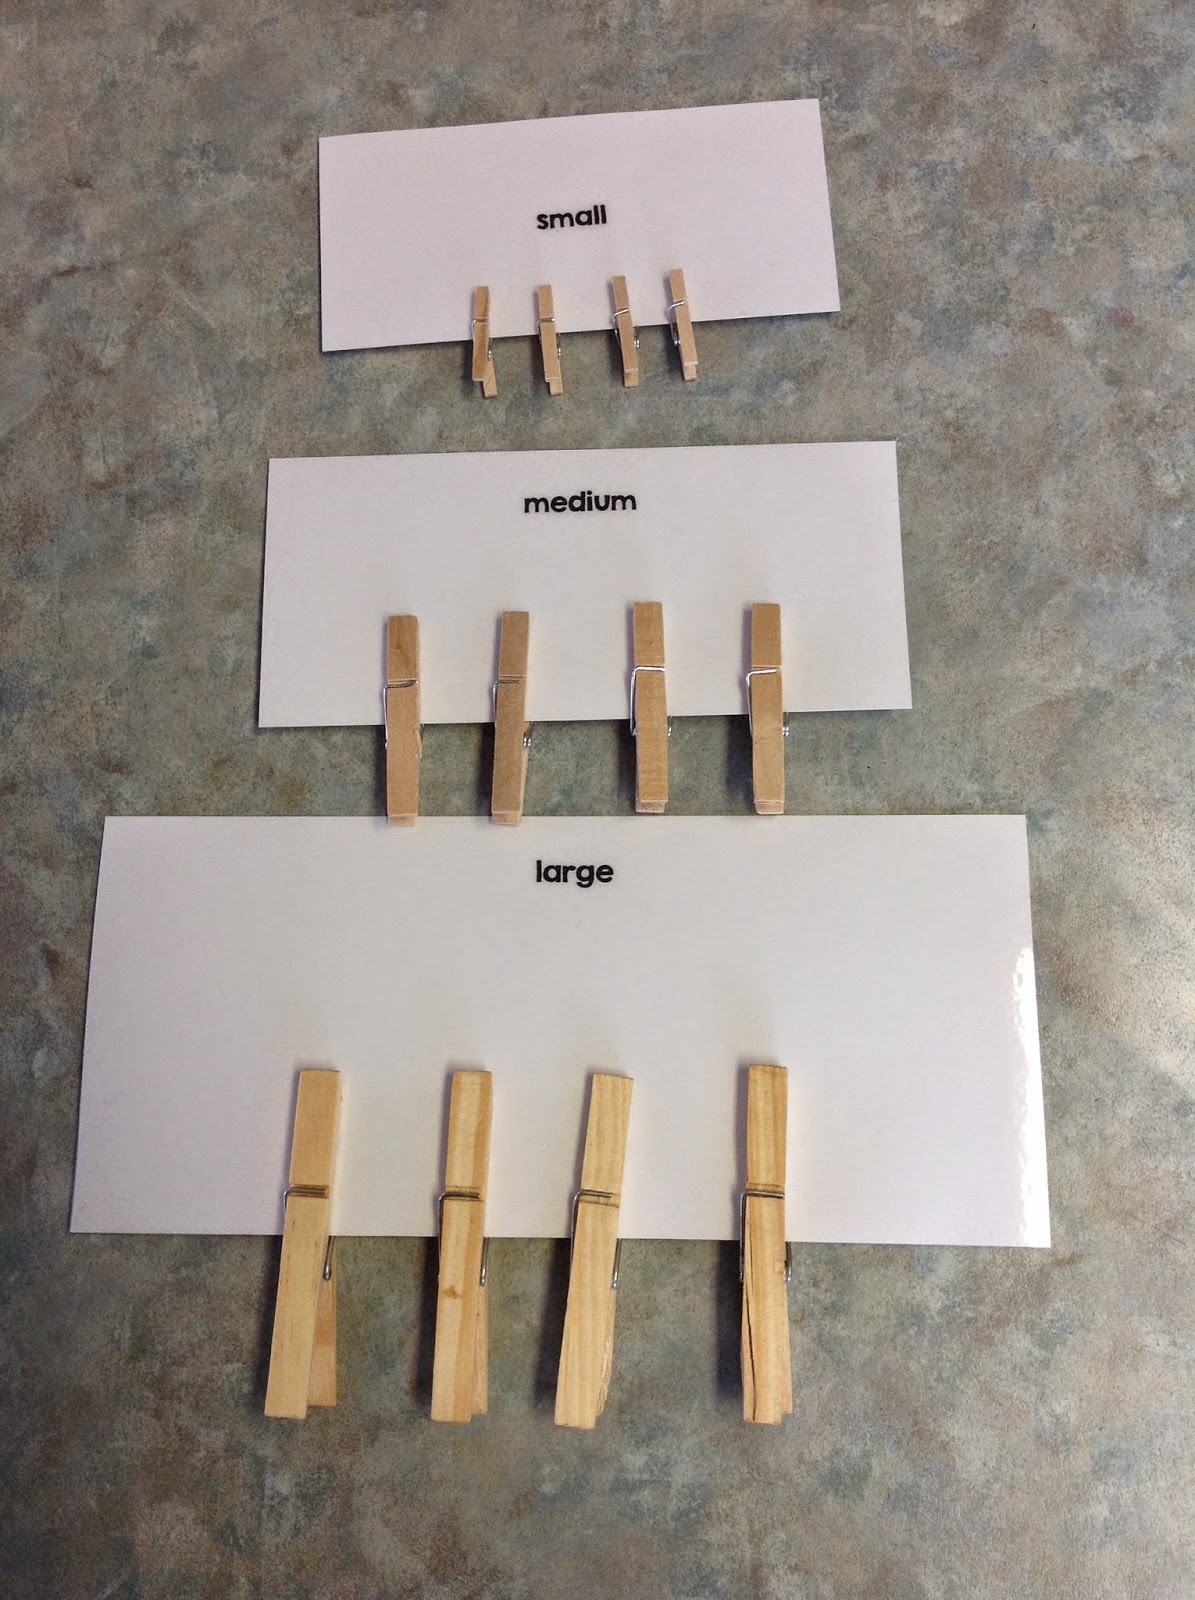
In the craft section of my local dollar store, they had clothespins in different sizes and colours.  These are perfect for making learning activities that focus on sorting by size and colour.


Another way that I use clothespins is to create count and clip cards.  Students count the pictures on the card and clip a clothespin to the correct answer.  I made these for our spring unit, which you can download for free by clicking on the picture.


One final way that I use clothespins in my classroom is to teach addition and subtraction.  These are difficult concepts for my students, so they need extra visual supports to help them understand.  I made these templates that includes a number line at the top so they can clip the clothespins there to use as counters.  I also used number cards to attach to the template using velcro for students beginning to learn this skill or who have difficulty with handwriting.  The teacher makes up the equation for the student to solve, and the student uses the clothespins to find the answer.  The student is taught to read the first number and then clip on the correct amount of clothespins.  Then they read the second part of the equation, "+ 2" and clip on two more clothespins.  Next, they read the entire equation, "3 + 2 =", and count the total number of clothespins to get the correct answer.  Then they find the correct number card and place it in the box.  If they can print, then I have them write in the number in the box.


The method is the same when teaching subtraction, except the students remove the amount of clothespins indicated by the second number in the equation.  This method works very well for teaching these concepts to visual learners.  If you would like these templates for your students, click on one of the pictures.


How do you use clothespins in your classroom?  I'd love to hear from you!  Leave me a comment below!  

Thanks for stopping by!


Sunday 12 April 2015

Structured Learning Part 4 - Visual Structure

Today, I am wrapping up my four part series on Structured Learning Strategies.  I wanted to write this post weeks ago, but life got in the way, as it often does!

What is Visual Structure? 

Visual structure adds a physical or visual component to tasks to assist students in understanding HOW an activity should be completed. Because students with ASD are less likely to be successful with only verbal directions, visual structure adds a tangible component to an activity to increase meaning and understanding. Visual structure also helps a student increase attention, engagement with materials, and allows students to locate the most relevant information while completing his/her work. 

Visual structure has three components:

Visual Instructions: Tells the student where to begin and the sequence of steps to complete an activity 

Visual Organization: How the space and materials are limited and/or arranged 

Visual Clarity: Emphasizes or draws attention to important or relevant information 

Why do I use Visual Structure with Students with ASD? 

Engagement of students with ASD is less likely unless careful planning in the design of educational materials and activities occurs. Traditional teaching procedures and resources, such as group lessons and worksheets, may not be appealing or easy to understand for students with ASD. 


There is substantial evidence that students with ASD have strengths in processing visual information in comparison to processing language or auditory information.  When instructions related to a task or assignment are given verbally, students with ASD may have difficulty understanding and responding quickly and appropriately. Providing the information visually, embedded within the activity, instead allows students to continually refer to instructions and have a clearer understanding of what is expected. Providing information visually capitalizes on the strengths of students and provides more opportunities for the student to practice the skill independently (without relying on verbal directives from staff). 

Students with ASD may have greater difficulty in organizing and sequencing materials due to deficits in executive functioning and/or challenges in modulating sensory input. Worksheets with a great deal of information, or large quantities of materials that may fall or become mixed together may be distracting or overwhelming for students. It is often necessary for staff members to assist in organizing materials, and to present them in a minimally stimulating manner. The placement of materials in containers, folders, baskets, or trays may be beneficial. Limiting the amount of information and size of the work space to reduce stimulation may also be helpful. 

Students with ASD may also have difficulty interpreting the importance of information and give undue attention to details. It may be necessary to emphasize the most important aspects of the task or activity in an effort to make the meaning more salient. This may require the use of color coding, numbering, highlighting, or adding additional visual cues. 

Along with visual structure, incorporating the unique interests of students with ASD into the content and/or layout of instructional activities is another strategy to increase both engagement and meaning. Capitalizing on student interests can provide motivation to complete activities, and students may find the activities more reinforcing than traditional social reinforcement from staff members or peers. 

How Do I Implement Visual Structure? 

When designing activities for students with autism it is important to first consider how instructions will be provided. It is essential to supplement verbal directions with visual information. This allows students to function more independently, as they can be taught to look to the materials for information, rather than relying solely on a staff member to guide the student through the task. Supplementing instructions with visuals also helps to teach students that materials can be used for multiple purposes. For example, students can learn through visual instructions that the small colored bears can be used sometimes for sorting colors, other times for patterning, and another time for counting. Visual instructions can be provided in a variety of ways depending on what the needs of the student are and the student’s level of functioning. For the most concrete learners, the materials themselves provide the instruction information, and for students who understand pictures/words, those abstract systems can provide instructions. 

For Example:

The materials define the task in this sorting activity.
A jig or product sample tells the student what the finished product should look like.

This mini-schedule provides a sequence of visual instructions for the student to follow.

Next, it is important to decide what types of organization may need to be incorporated into the activity to allow the student to be more successful and independent. It is helpful to consider stabilizing materials, containing task materials in/on a tray, limiting the number of parts or pieces, and setting up some of the task for the student ahead of time. 
Organization of a reading activity: materials are self-contained in a book (extra flap added to the book for pieces); work space is defined; all materials are stabilized. 
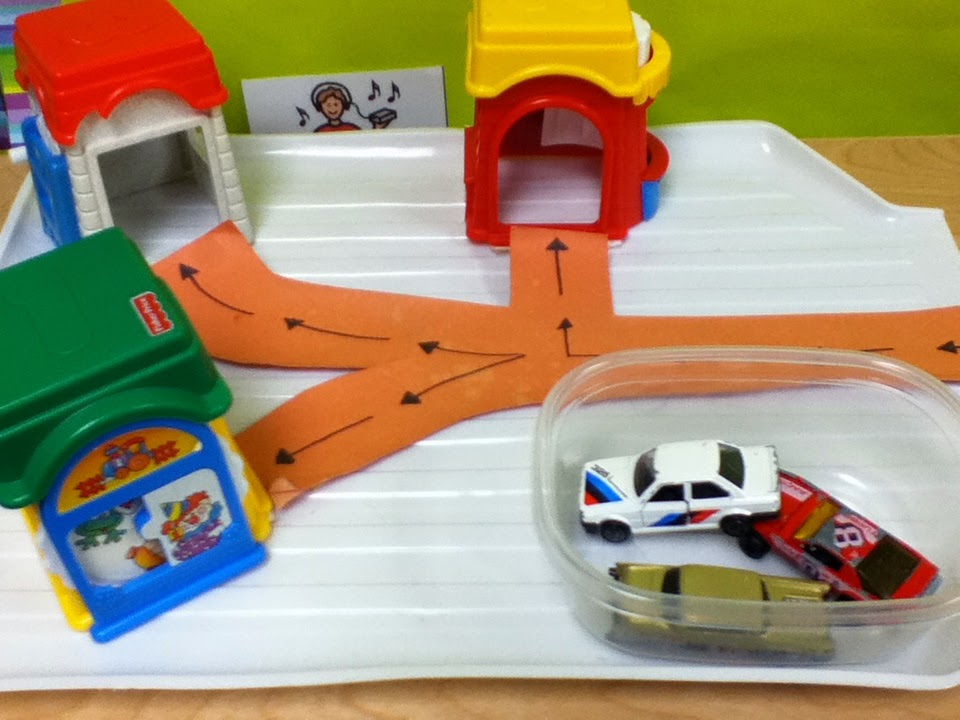
Organization of a play task: materials are placed in a container and stabilized on tray; work space is defined; materials are limited. 

In addition, it is helpful to provide additional clarity to students to help identify what is most important.  
Clarifying where the student response should go: the black box indicates where the student should put his/her answer.

Finally, when designing teaching materials for your students with ASD, it is helpful to include student interest to increase meaning and motivation. It may not be feasible to incorporate student interest in every activity, however, designing a number of highly motivating tasks to intersperse in a work session may assist students in starting their work more successfully and in maintaining on-task behavior throughout. 

A writing task using lego structures the student built.

Sequencing the days of the week with the Hungry Caterpillar.

A counting worksheet with Angry Birds.

Tips for Implementing Visual Structure: 
Think about how materials can be used across curricular areas or for more than one purpose to ensure the most use. 
Think creatively about how activities can be made. Use  volunteers or student helpers
Consider how you might share resources with other teachers or create an activity lending library in your school. 
Instructional activities should relate to your individual assessments of student needs and the curriculum used by your school board. 

How do you use visual structure in your classroom?  I'd love to hear your ideas!  Leave me a comment below!

Thanks for stopping by!


Wednesday 8 April 2015

Learning with Your Craft Stash - Pom Poms

Today I am linking up with Kim over at Life Over C's to highlight different ways to use regular craft supplies to enhance learning.  This is going to be a 21-day event covering many different craft materials you might have stashed at your home or classroom. I will not be blogging for each of the 21 days, but I will be linking up with her several times throughout the month. Each blog post will feature a different craft item. You don't want to miss a day, so make sure to click on the image to hop on over to all the action. 


Today is all about learning with pompoms. Pom Poms are cheap and easy to use for lots of different learning.  You can easily target multiple learning skills with Pom Poms. 


I use pom poms for teaching a variety of skills in my classroom.  I love that they can be used with students across abilities for a wide range of learning activities.  For my really early learners, I use them for simple put in and put on tasks like these which focus on developing fine motor skills.


For my mid level students, I use them to teach sorting by colour and size.


I also use them to teach patterning.  Use can use patterning cards for students who are just learning this skill and ice cube trays for students who are ready to create their own patterns.


And finally, I use them to teach counting and one-to-one correspondence.  For students who are just learning to count, I use cards like these to assist them with this skill.


How do you use pom poms in your classroom?  I'd love to hear from you!  Leave me a comment below!  To help you get started with using pom poms in your classroom, I have created these freebies!  It contains all of the printables included in this post and more!  You can download them from my TPT store!


Thanks for stopping by!  Until next time,

Monday 6 April 2015

Birthday Giveaway Winner!


Congrats Krisitn!  And thanks to all who entered!  Make sure you email me to claim your prize!

Have a great day!


Saturday 4 April 2015

It's My Birthday!

Tomorrow is my 40th birthday!  Even though, I hate to say it, it's true!  Tomorrow, I turn the big 4-0!  Yikes!!!  It's been a great week of celebrating so far.  Last weekend, my hubby took me to Niagara for the weekend and I was SPOILED!!!  We stayed at a beautiful hotel overlooking the falls, with a Starbucks in the lobby!  If you know me, you will know that having a Starbucks in the hotel is a must!!!  I went to the spa each morning for some pampering, visited some great new wineries, went to the casino, and ate some delicious meals!  We ate at the Rainbow Room Saturday night and it was one of the best meals I have ever had. We ended the weekend by stopping at the new outlet mall on the way home and I got a new Coach purse!  It was a perfect weekend!

This weekend, I continue celebrating with family and friends and you!  It's my birthday, but you get the gifts!


Tomorrow, everything in my TPT store will be marked down to 75 cents in honour of the year of my birth!  I will also be giving 4 free products (of your choice) to one lucky winner!  To enter, leave a comment on this post, and follow me here and on TPT.  The sale and giveaway end at midnight tomorrow night, and I will announce the winner Monday morning here and on Facebook!  

See you tomorrow!


Friday 3 April 2015

Five for Friday!

Hi Everyone!  I am so thankful for having today off.  I could really use a four day weekend!  Plus it's my 40th birthday on Sunday, so having a four day weekend seems fitting!  It's a big one this year and to celebrate I will be having a big sale at my TPT store.  Make sure to check back on Sunday for some serious celebrating and savings!  Today, I wanted to share some photos from this week.  We celebrated two events this week in the classroom; Easter and World Autism Awareness Day.  We raised the flag, wore blue, and had lots of fun!  Don't forget to head over to Doodle Bugs Teaching for more bloggers sharing about their week! 


1.  We started our day yesterday by raising the flag to celebrate World Autism Awareness Day!  Our school was also a sea of blue, with many staff and students wearing blue clothing.


2.  We made some blue marshmallow pops, and covered them with Easter sprinkles in honour of Easter and World Autism Awareness Day!


3.  We had an Easter egg hunt in the afternoon!


4.  And had fun taking some selfies!


5.  We also enjoyed some delicious cake to celebrate my birthday!


Thanks for stopping by and don't forget to check back on Sunday for details on my birthday sale at my TPT store!


See you Sunday!


Wednesday 1 April 2015

Work Basket Wednesday


Hi Everyone!  I hope you are enjoying this beautiful sunny day!  Today, I am linking up with Christine Reeve at Autism Classroom News for Workbasket Wednesday.  On the first of every month, Christine hosts this link party to share some great ideas for independent work tasks.  This week's theme seems to be Easter, and more specifically eggs!  Christine and Gabrielle from Teaching Special Thinkers have some great ideas for using plastic eggs.  Make sure to check them out!  I do have some egg tasks to share, but am sharing more of the Easter tasks my students have been doing for the last two weeks.

First up are some sorting tasks.  I use a lot of different sorting tasks in my independent work area as most of my students have mastered this skill.  For my Easter sorting tasks, I have used some plastic bunnies I found at the dollar store, plastic eggs and mini erasers.  We had the foam bunnies in our craft cupboard, which I used as sorting mats.  I found the coloured bowls at Dollarama and the coloured baskets are from an egg dyeing kit.


Next, I made some simple put in tasks for my youngest student.  He doesn't have a lot of skills yet, so we need some really easy tasks for him.  I found the bunny in the top photo at Walmart.  It's actually a cup and came with a straw, but I took the straw out and the hole at the top is perfect for these small pompoms we had in our craft cupboard.  I've had the eggs and tray in the bottom photo for a couple of years now and they are great for a different type of put in activity.


I also made this simple task for him, which involves using the spoon to transfer the eggs from one bowl to another.


I also made some assembly tasks, using plastic eggs.  In the first task, the students have to put the hair elastics in the corresponding egg. I found these eggs with the hair elastics already in them at the Dollar Tree.  I love it when I find pre-made tasks!  In the second task, students have to put the eraser in the matching egg.  And in the third task, students match the halves of the egg and put them together.


The next tasks that I have to share today are using Bingo Dauber pages from DLTK-Kids.  I love that this site has pages for all kinds of themes and holidays, and that I can use them several different ways.  In the photo on the right, students simply put the pom poms in the dots, matching the colours.  In the photo on the left, I put alphabet stickers in the dots and students have to find and cover the letter /E/ with bingo chips.


The last task involves decorating Easter eggs, following the model in the photo.  I have four different decorated egg tasks, but I only took a photo of one.  These tasks are made with magnetic pieces that I found at Dollarama years ago.


What's in your workbasket or independent work tasks this week?  I'd love to hear from you!  Leave me a comment or send me an email!  

And don't forget to come back tomorrow to celebrate Autism Awareness Day!  I am participating in a giveaway that you won't want to miss!  Some awesome special education teachers are joining together to give you the chance to win a $50 TPT gift card!  Come back tomorrow for all of the details!

Until then,


Recommendations by Engageya